1. Basic installation and configuration of aTV
Download the latest aTV Scheduler version in the download section.
Save the file to a temporary location on your computer, eg. your desktop.
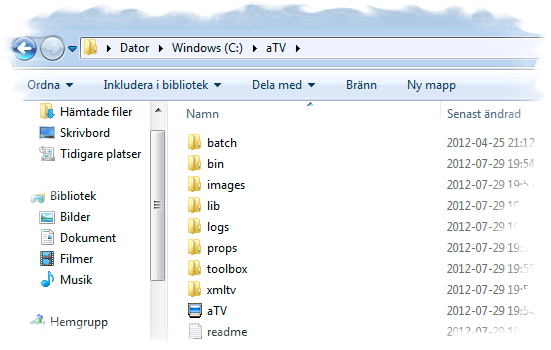
Unzip the archive and choose to save the aTV folder in the following path;
C:\aTV - and the files should show up like this
 There's no problem to install aTV in an other location but this is recommended as many
of the configuration examples uses this path.
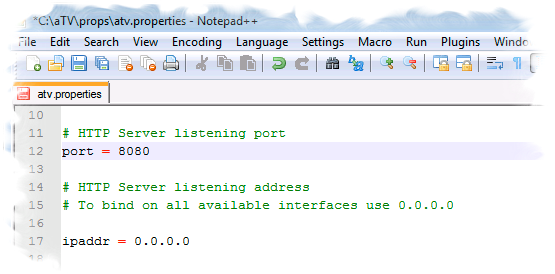
The next step to be taken before aTV Scheduler is ready to be started is that the first
section of the parameters file .\props\atv.properties must be edited to reflect your computer settings. The defauls in this file should be ok for most setups, but look it through nevertheless.
You could start aTV Scheduler at this point but it will not rock your world as you probably yet have to configure and get some XMLTV data for aTV Scheduler to read.
Section no. 2 of atv.properties, regarding the channel mapping properties, is to be configured once the XMLTV data is available and your DVB-program is setup correctly when it has
all channels tuned properly. See respective guide for MyTheatre or DVBViewer for this.
Section no 3 of atv.properties deals with extra functions if you want to setup aTV to
manage video conversions of your recorded tv shows, please see guide for aTVBatch for
this. If you're not interested in this for the moment just leave all parameters in section 3 as is.
So next step will be setup of XMLTV...
News
2012/07/12
Welcome to the new home of aTVScheduler!
2012/05/12
Latest release of aTVScheduler is 0.99
Links
XMLTV Project
DVBViewer
DVBCore